Using Custom Domains
This topic describes how to use the Replicated Vendor Portal to add and manage custom domains to alias the Replicated registry, the Replicated proxy registry, the Replicated app service, and the Download Portal.
For information about adding and managing custom domains with the Vendor API v3, see the customHostnames section in the Vendor API v3 documentation.
For more information about custom domains, see About Custom Domains.
Add a Custom Domain in the Vendor Portal
To add and verify a custom domain:
-
In the Vendor Portal, go to Custom Domains.
-
In the Add custom domain dropdown, select the target Replicated endpoint.
The Configure a custom domain wizard opens.
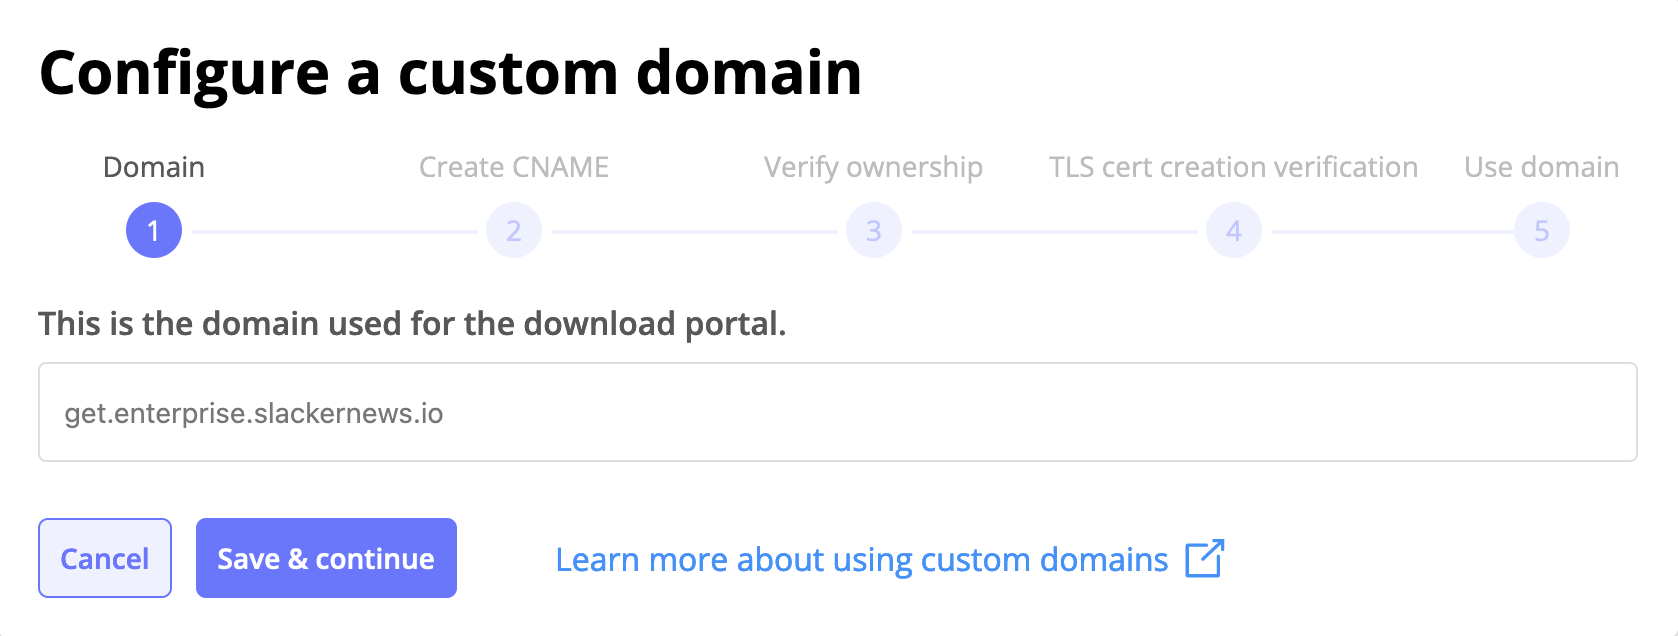
-
For Domain, enter the custom domain. Click Save & continue.
-
For Create CNAME, copy the text string and use it to create a CNAME record in your DNS account. Click Continue.
-
For Verify ownership, ownership will be validated automatically using an HTTP token when possible.
If ownership cannot be validated automatically, copy the text string provided and use it to create a TXT record in your DNS account. Click Validate & continue. Your changes can take up to 24 hours to propagate.
-
For TLS cert creation verification, TLS verification will be performed automatically using an HTTP token when possible.
If TLS verification cannot be performed automatically, copy the text string provided and use it to create a TXT record in your DNS account. Click Validate & continue. Your changes can take up to 24 hours to propagate.
noteIf you set up a CAA record for this hostname, you must include all Certificate Authorities (CAs) that Cloudflare partners with. The following CAA records are required to ensure proper certificate issuance and renewal:
@ IN CAA 0 issue "letsencrypt.org"
@ IN CAA 0 issue "pki.goog; cansignhttpexchanges=yes"
@ IN CAA 0 issue "ssl.com"
@ IN CAA 0 issue "amazon.com"
@ IN CAA 0 issue "cloudflare.com"
@ IN CAA 0 issue "google.com"
Failing to include any of these CAs might prevent certificate issuance or renewal, which can result in downtime for your customers. For additional security, you can add an IODEF record to receive notifications about certificate requests:
@ IN CAA 0 iodef "mailto:your-security-team@example.com" -
For Use Domain, to set the new domain as the default, click Yes, set as default. Otherwise, click Not now.
noteReplicated recommends that you do not set a domain as the default until you are ready for it to be used by customers.
After the verification checks for ownership and TLS certificate creation are complete, the Vendor Portal marks the domain as Configured.
-
(Optional) After a domain is marked as Configured, you can remove any TXT records that you created in your DNS account.
Use Custom Domains
After you add one or more custom domains in the Vendor Portal, you can configure your application to use the domains.
Configure Embedded Cluster to Use Custom Domains
You can configure Replicated Embedded Cluster to use your custom domains for the Replicated proxy registry and Replicated app service. For more information about Embedded Cluster, see Embedded Cluster Overview.
To configure Embedded Cluster to use your custom domains for the proxy registry and app service:
-
In the Embedded Cluster Config spec for your application, add
domains.proxyRegistryDomainanddomains.replicatedAppDomain. Set each field to your custom domain for the given service.Example:
apiVersion: embeddedcluster.replicated.com/v1beta1
kind: Config
spec:
  domains:
    # Your proxy registry custom domain
    proxyRegistryDomain: proxy.yourcompany.com
    # Your app service custom domain
    replicatedAppDomain: updates.yourcompany.com
For more information, see domains in Embedded Cluster Config.
-
Add the Embedded Cluster Config to a new release. Promote the release to a channel that your team uses for testing, and install with Embedded Cluster in a development environment to test your changes.
Set a Default Domain
Setting a default domain is useful for ensuring that the same domain is used across channels for all your customers.
When you set a custom domain as the default, it is used by default for all new releases promoted to any channel, as long as the channel does not have a different domain assigned in its channel settings.
Only releases that are promoted to a channel after you set a default domain use the new default domain. Any existing releases that were promoted before you set the default continue to use the same domain that they used previously.
In Embedded Cluster installations, the KOTS Admin Console will use the domains specified in the domains.proxyRegistryDomain and domains.replicatedAppDomain fields of the Embedded Cluster Config when making requests to the proxy registry and app service, regardless of the default domain or the domain assigned to the given release channel. For more information about using custom domains in Embedded Cluster installations, see Configure Embedded Cluster to Use Custom Domains above.
To set a custom domain as the default:
-
In the Vendor Portal, go to Custom Domains.
-
Next to the target domain, click Set as default.
-
In the confirmation dialog that opens, click Yes, set as default.
Assign a Domain to a Channel
You can assign a domain to an individual channel by editing the channel settings. When you specify a domain in the channel settings, new releases promoted to the channel use the selected domain even if there is a different domain set as the default on the Custom Domains page.
Assigning a domain to a release channel is useful when you need to override either the default Replicated domain or a default custom domain for a specific channel. For example:
- You need to use a different domain for releases promoted to your Beta and Stable channels.
- You need to test a domain in a development environment before you set the domain as the default for all channels.
In Embedded Cluster installations, the KOTS Admin Console will use the domains specified in the domains.proxyRegistryDomain and domains.replicatedAppDomain fields of the Embedded Cluster Config when making requests to the proxy registry and app service, regardless of the default domain or the domain assigned to the given release channel. For more information about using custom domains in Embedded Cluster installations, see Configure Embedded Cluster to Use Custom Domains above.
To assign a custom domain to a channel:
-
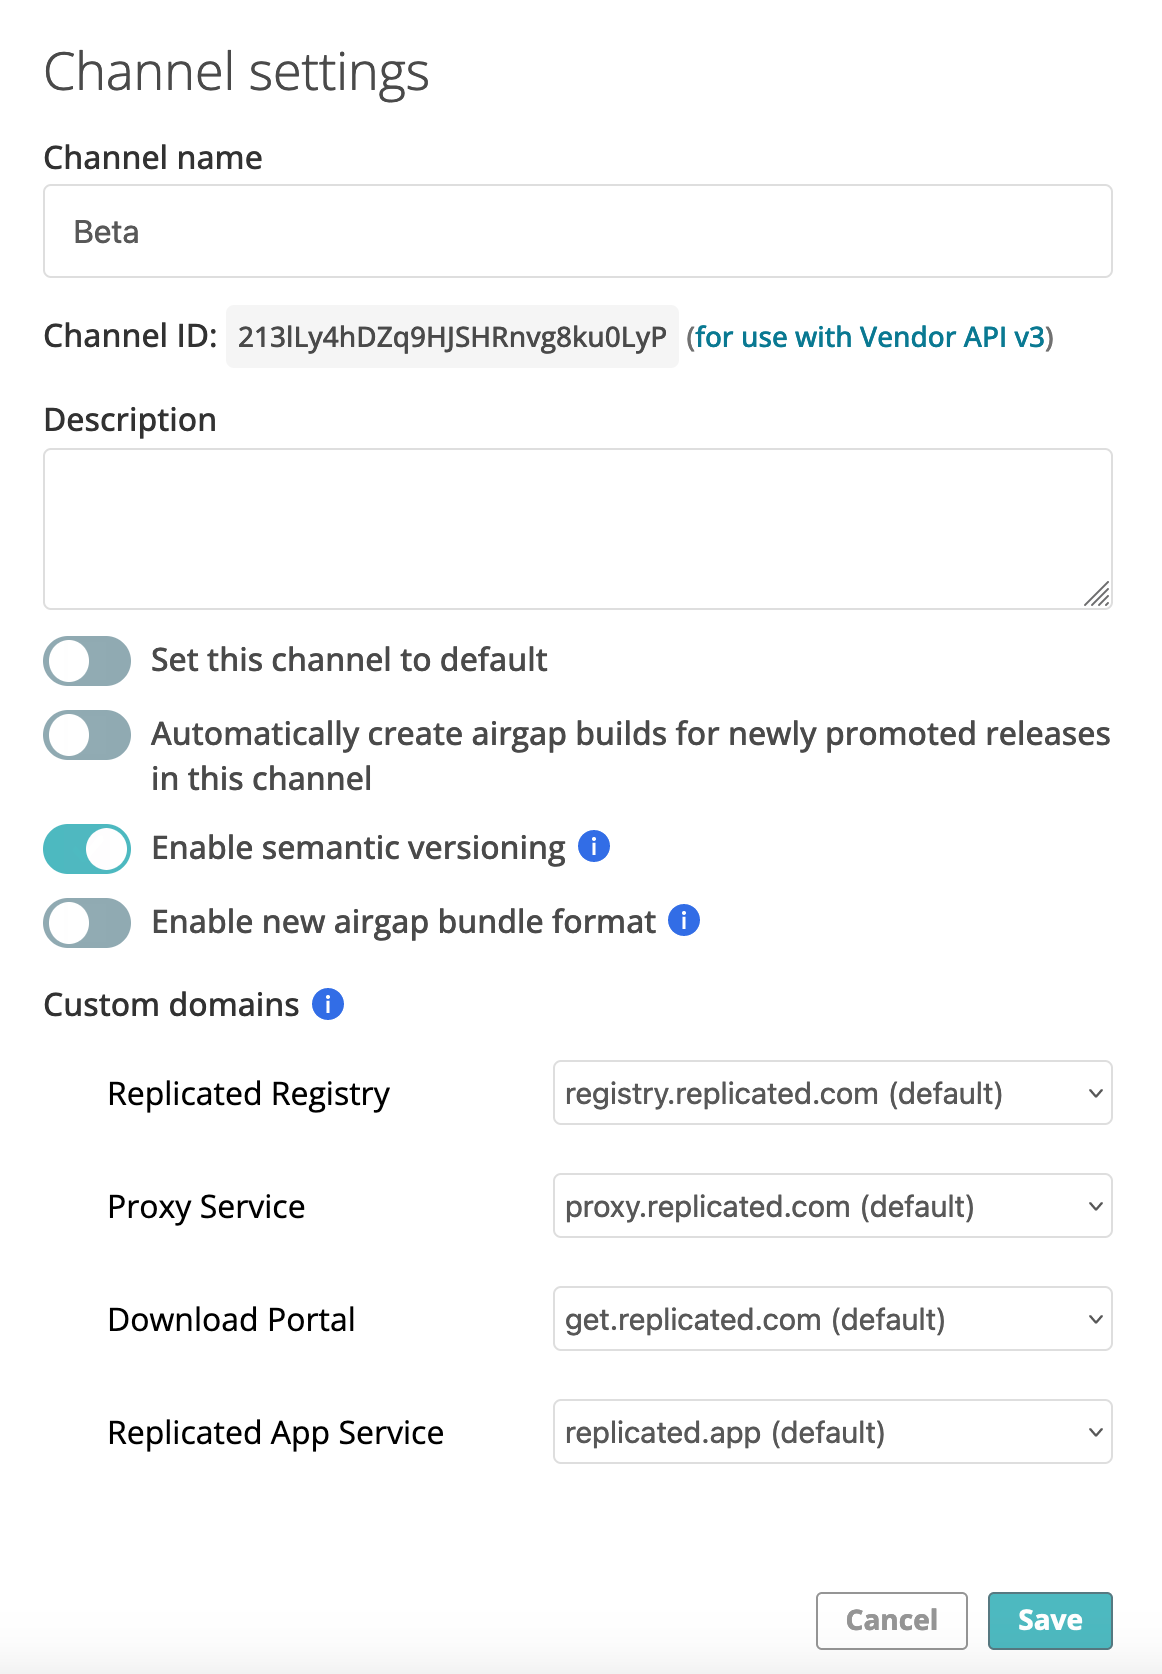
In the Vendor Portal, go to Channels and click the settings icon for the target channel.
-
Under Custom domains, in the drop-down for the target Replicated endpoint, select the domain to use for the channel. For more information about channel settings, see Settings in About Channels and Releases.
Reuse a Custom Domain for Another Application
If you have configured a custom domain for one application, you can reuse the custom domain for another application in the same team without going through the ownership and TLS certificate verification process again.
To reuse a custom domain for another application:
-
In the Vendor Portal, select the application from the dropdown list.
-
Click Custom Domains.
-
In the section for the target endpoint, click Add your first custom domain for your first domain, or click Add new domain for additional domains.
The Configure a custom domain wizard opens.
-
In the text box, enter the custom domain name that you want to reuse. Click Save & continue.
The last page of the wizard opens because the custom domain was verified previously.
-
Do one of the following:
-
Click Set as default. In the confirmation dialog that opens, click Yes, set as default.
-
Click Not now. You can come back later to set the domain as the default. The Vendor Portal shows shows that the domain has a Configured status because it was configured for a previous application, though it is not yet assigned as the default for this application.
-
Remove a Custom Domain
You can remove a custom domain at any time, but you should plan the transition so that you do not break any existing installations or documentation.
Removing a custom domain for the Replicated registry, proxy registry, or Replicated app service will break existing installations that use the custom domain. Existing installations need to be upgraded to a version that does not use the custom domain before it can be removed safely.
If you remove a custom domain for the download portal, it is no longer accessible using the custom URL. You will need to point customers to an updated URL.
To remove a custom domain:
-
Log in to the Vendor Portal and click Custom Domains.
-
Verify that the domain is not set as the default nor in use on any channels. You can edit the domains in use on a channel in the channel settings. For more information, see Settings in About Channels and Releases.
importantWhen you remove a registry or Replicated app service custom domain, any installations that reference that custom domain will break. Ensure that the custom domain is no longer in use before you remove it from the Vendor Portal.
-
Click Remove next to the unused domain in the list, and then click Yes, remove domain.